
How to Create a Charming Urbanite Walkway for Free (Almost)
Okay, so it’s quite likely that you started reading this post because you wondered just what exactly urbanite is and how you can get it for free. Well, the truth is that Urbanite is not a material at all. It’s the same old concrete that might make up some of your house’s current pathways. It’s just broken into fragments, and laid with stones and bricks to make it look, in my opinion, more charming.

Urbanite is not a common choice for a walkway, but it can be a great option for those who want a green landscaping material with some quirky charm on a low budget. If you have a current concrete walkway, you can repurpose it into urbanite. If not, you can put an a.p.b. out for people who might be looking to get rid of old concrete. Of course, the latter option will require a truck and some helpful friends or family members who wouldn’t mind lifting heavy and jagged concrete pieces. At the very least, pizza might be a necessary incentive.
Luckily for me, I had an ugly, partially-broken concrete walk already in my backyard . . . I just had to break it up.
Working with urbanite can be physically exhausting
I’m not going to lie. The process of creating urbanite is NOT easy. It is back-breaking work, which I always seem to find myself doing during the hottest week of the Summer. I also didn’t have any help during the day because Michael was doing his own back-breaking work building a retaining wall for Habitat for Humanity, though he was able to help me each day when he got home. I’m not deterred by working on my own though, so I just went for it.
Even though I am sure you will be smart and wait till you have help and some nice weather, you will still be sore, stiff and exhausted. There is just no easy way of breaking up concrete. You need a pick axe or a cutter mattock, a sledge hammer, some work gloves, safety goggles, some water (hydration), good tunes (motivation), and a wheel barrow.
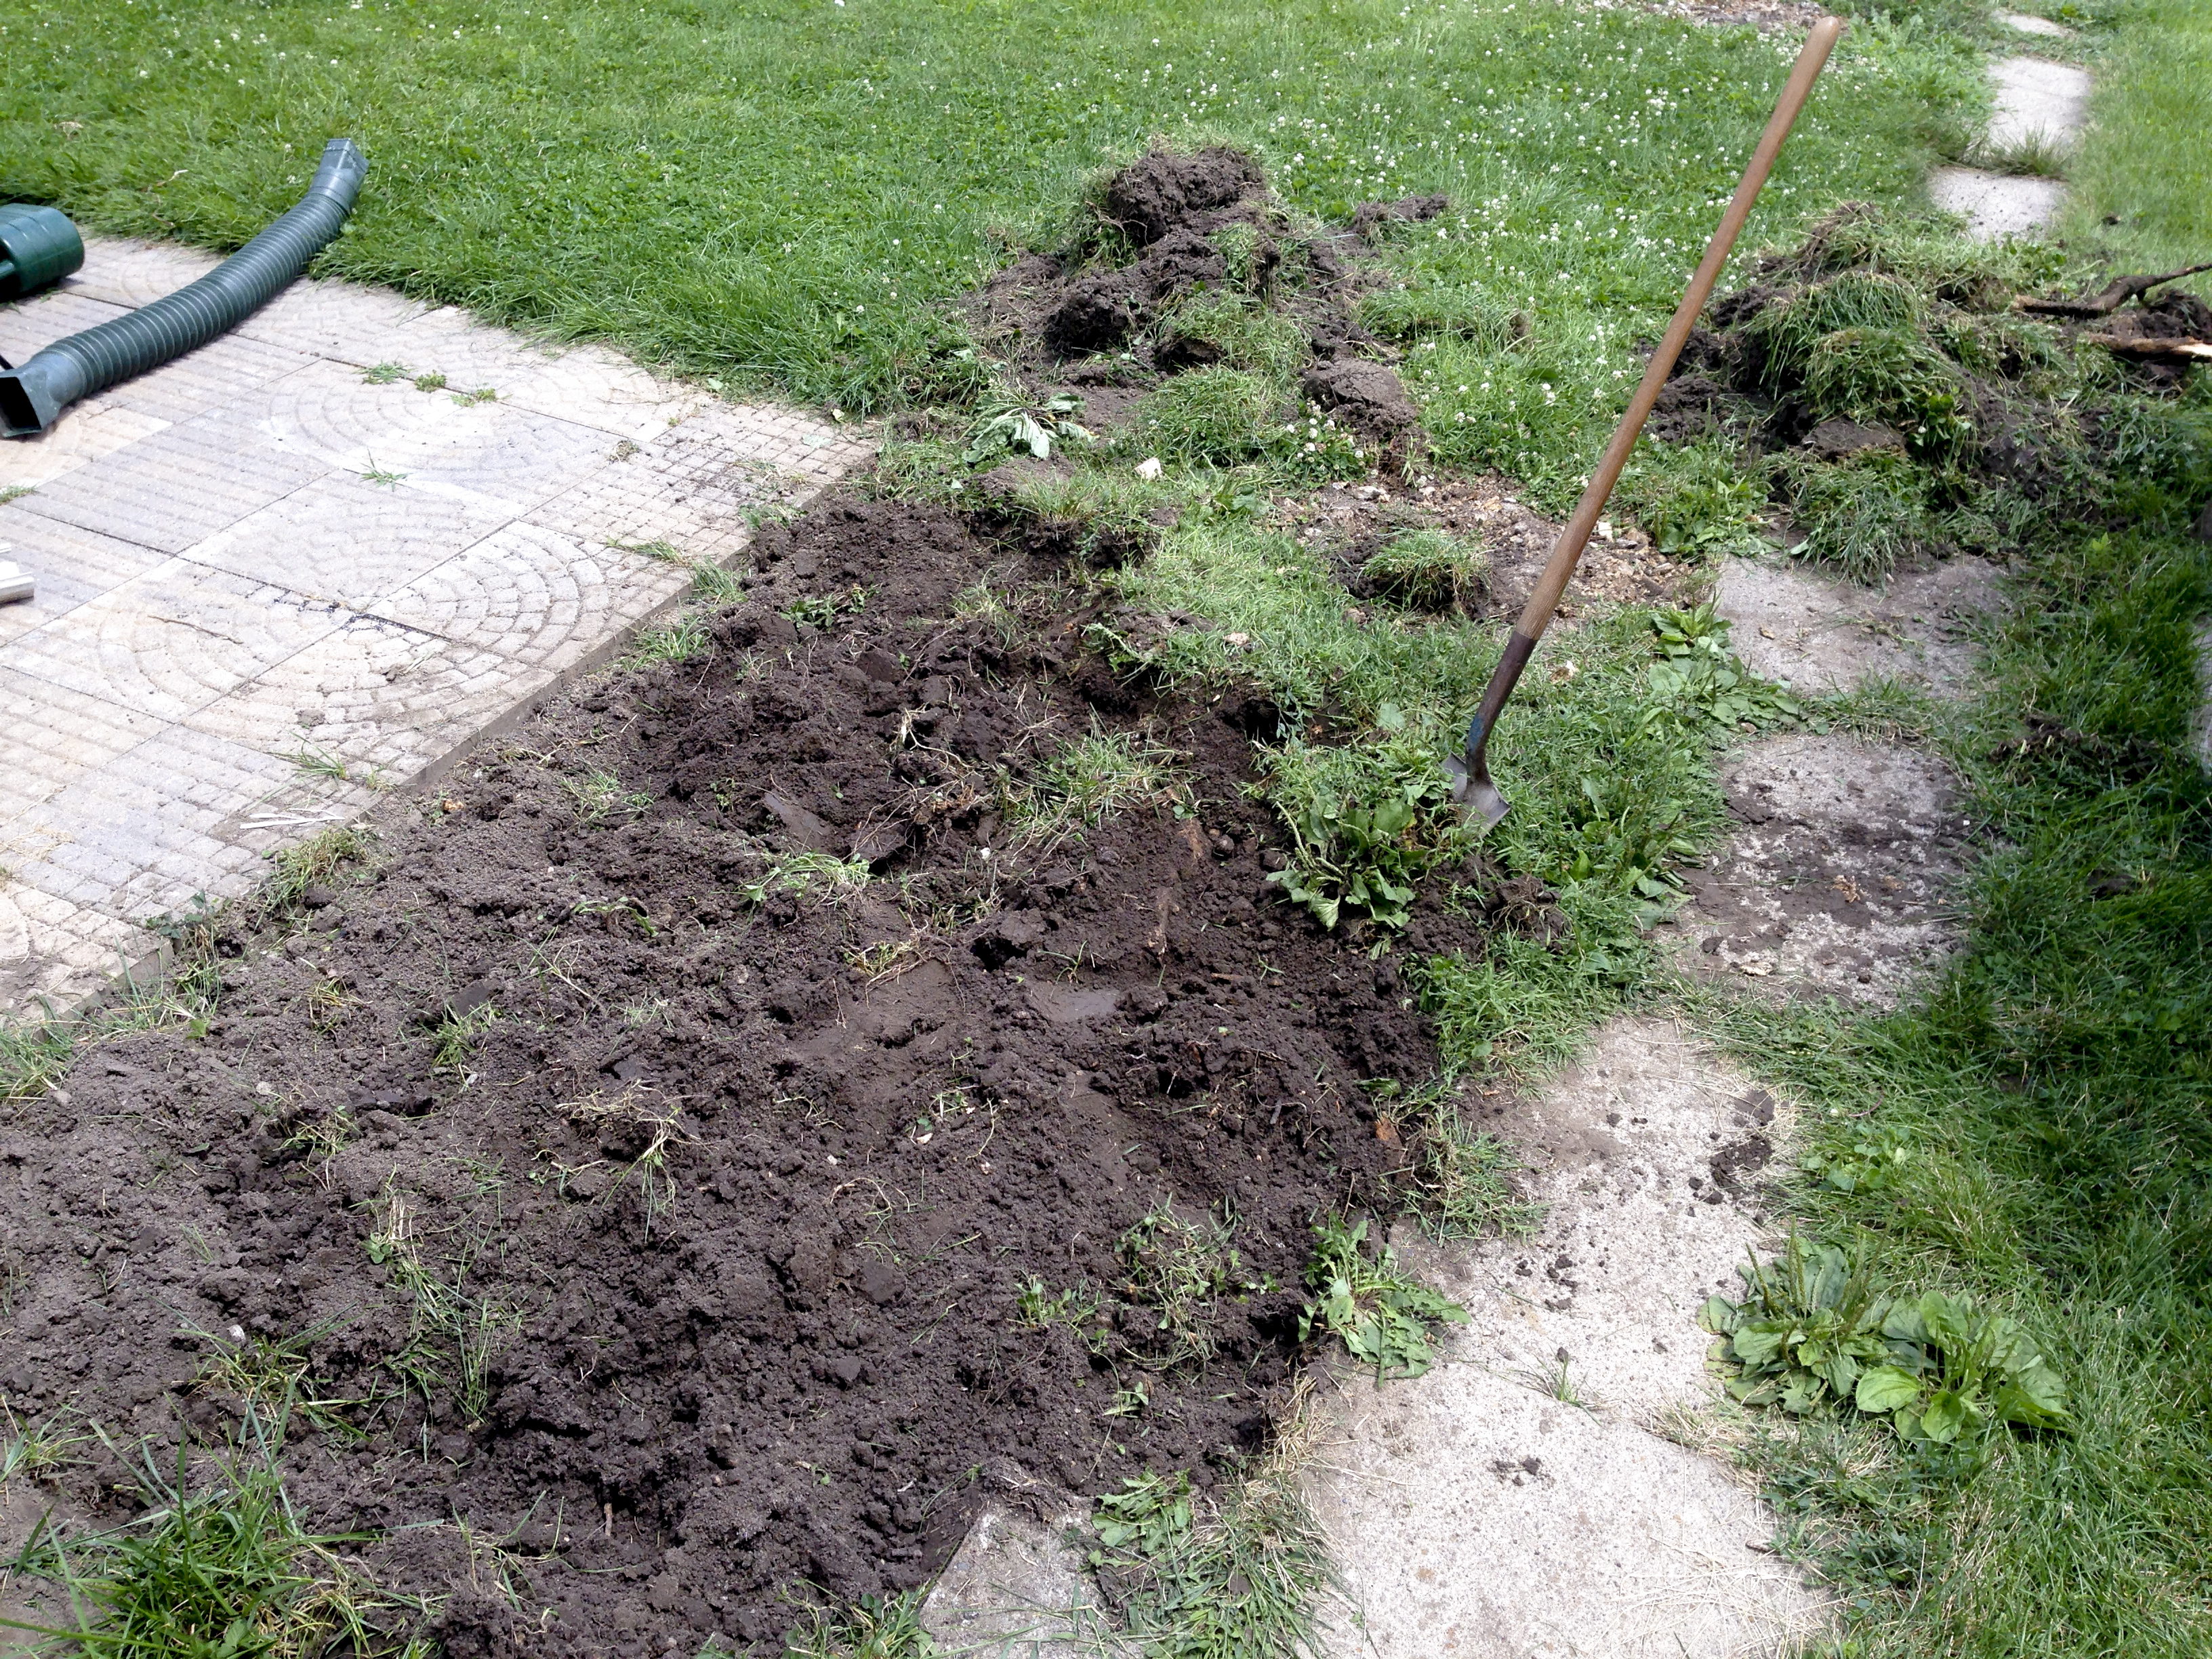
I started by prying up the smaller broken pieces of concrete with my pick axe. I just swung the ax so that the end poked under the block of concrete. I then used the handle as a lever and pulled it back to pry the concrete out of the ground. I was only able to do this for smaller pieces of concrete, as the bigger pieces needed to be broken up before they could be pried out. Also, even though I could get some larger pieces pried out, I couldn’t lift them on my own. Concrete is heavy!

To break up the larger pieces, I turned to my sledge hammer. Just a good over-the-head swing is all it takes. Don’t be timid with this or you will end up working harder than you should, swinging over and over again. If you bring the sledge hammer down in the middle of the concrete, it usually breaks up into a number of larger fragments similar to stepping stones. You can also use your pick axe or a cutter mattock tobreak the concrete into more pieces.You will also get some smaller pieces. Don’t toss these out just yet because they may work to fill in some gaps in your walkway.
Once you break up the concrete, move the pieces out of the way. I just put them on the grass next to the old walkway so that I could start digging out and leveling that area.
Take a moment to lay out and plan your path
As you are planning the shape of your walkway, it’s helpful to realize that urbanite works best with more organic, winding paths. You will have more freedom to fill in the path with a random mix of stones and concrete this way. This also worked out well for me because I had two stubborn tree stumps that had to be worked around (if I didn’t want to rent a backhoe). I just decided to wrap the path around the stumps, and make one of them a base for my fire pit and the other a base for a large flower pot. Creative problem solving!
If you can easily visualize the path you want, you can just start digging. If you are more of a planner, you may want to stake off the width and shape of your path before you dig. You can do this with stakes and string or even spray some paint to mark where to dig.
I dug about a 8-10 inches deep. We also decided to incorporate a french drain that terminated into a dry creek bed, so I had to dig that part out even deeper to accommodate the drain. Your depth might depend on climate, soil and the amount of crushed limestone you plan on using. Some people use no crushed limestone, but this can lead to shifting and cracking over time. It just depends on your priorities and purpose for the path.
As I dug, I made sure to flatten out the dirt and I used a level to make sure that the path sloped away from the house. This is the most important tip for creating any walkway. You have to make sure that rain will run away from your foundation to prevent damage to your house. Seriously, don’t skip this step!

After I had a nice flat trench for the walkway, I rolled out some weed tarp to block weeds and grass from growing up through my walkway. This is an optional step and it doesn’t guarantee that you won’t get weeds. Sadly, I’m still looking for the product that can save me from weeding. It can be helpful though and it is easy enough to do. Just roll out the weed tarp, cut off the excess, and stake down the fabric with the provided pins. Make sure that it is flat and secured before moving on to the next step.

After the weed fabric, I needed to fill the trench with crushed limestone, leaving about 2-3 inches for my stones and sand. Crushed limestone helps to even out the stones as I set them and it creates a solid base that will help to keep my stones in place over time. You will need to purchase some crushed limestone at your local home store. You can use your wheel barrow to pour it into your trench, or just pour it straight from the bag. You will also need to tamp it down into a flat surface. You will need a tamper to do this, though you might be able to get away with stomping it down. Also don’t forget to double check that your walkway is still sloping away from your house after you tamp down the crushed limestone.
Don’t be afraid to mix stones and bricks or pavers
Now to the fun part, laying out your path. Now, you can get away with just using the broken up concrete, but you will have more fun if you add a few other materials. For me, I was lucky to find old bricks when digging up another part of my yard. I also am lucky enough to live next to a great rock store that offered a ton of landscape rocks for under $50. I decided to incorporate both into my design. I also purchased some playground sand and polymeric paving sand. The polymeric sand is optional, but it will help to solidify your walkway, making it more durable.

I started by pouring a little bit of sand onto the crushed limestone. I didn’t use much, just about an inch. I then laid in my concrete pieces. Some of them were uneven on the back so I pulled them out and poured in a little more sand in the areas where there was less mass. I also wiggled them into the sand to set them a little more securely. I interspersed bricks and some larger landscaping rocks. I then filled the cracks in with more sand, leaving about an inch at the top. I also placed smaller landscaping rocks between the cracks.
I continued this process until the entire walkway was filled with my urbanite pieces, bricks and stones. As I mentioned before, I also left a portion of the walkway to function as a dry creek bed for drainage. Having a dry creek bed in my walkway meant that there was an area that people had to step over, and even though I think it’s quaint, it’s not for everyone.
![urbanite feet [dev]-](https://i2.wp.com/rehabdorks.com/wp-content/uploads/2016/01/urbanite-feet-dev-.jpg)
Once you are done with your stone setting, you can finish off your path with polymeric sand. Simply pour the sand over the stones and then carefully sweep it into the crevices. You may need to do this a couple times before you get enough sand in the spaces. Follow the directions on your polymeric sand bag to set the sand. It will require you to mist the sand with water, possibly multiple times. The sand becomes like a grout when it is moistened so it seals and sets the entire walkway in place.


Once you have set the stones with polymeric sand, you are done. You may want to add some more sand each year if necessary to maintain your walkway, but that’s it.
Even though you have to spend a little dough on tools and supplemental materials, you can create an eco-friendly unique walkway without too much money. It’s hard work, but it’s also a fun way to add charm and character to your landscaping.
Have you ever used urbanite in landscaping projects?
-
 Installing a Peel and Stick Wallpaper Backsplash
Well, hello there. It’s been a while, and a lot has happened since
Installing a Peel and Stick Wallpaper Backsplash
Well, hello there. It’s been a while, and a lot has happened since -
 Our Modern Victorian Bathroom Renovation Progress
Making Progress on a Complete Bathroom Transformation
Our Modern Victorian Bathroom Renovation Progress
Making Progress on a Complete Bathroom Transformation