
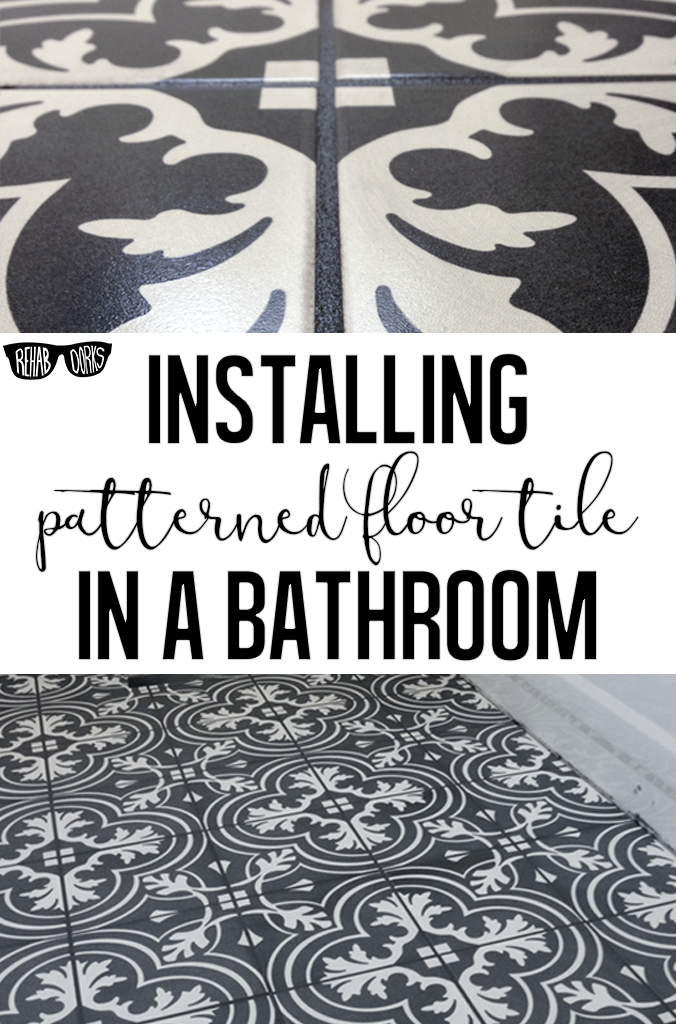
Installing Patterned Floor Tile in Our Victorian Bathroom
Of all of the improvements we are making to our bathroom (and there are a lot), I am most excited (over the moon excited) about the floor tile. Since our house is a 1920’s Victorian, we decided to go with a tile that looks like it’s straight out of that time period. We chose an encaustic-look tile by Merola in a 1920’s-inspired black and white print. This tile mimics the look of more expensive encaustic or cement tiles that were used in Victorian houses at that time and it is just so stinking pretty.
This post uses affiliate links. Please see our terms & conditions section for further information.
When we first opened the tile I was a little worried because, though the tile is basically black and white, the color is actually more of a very dark gray and a very light gray. Now that we have the floor down though, I can see how the more muted values coupled with the matte texture make the tiles more functional in hiding dirt from normal foot traffic. They also still go well with all of our white fixtures and the white subway tile we’re installing on the walls.

I started by laying out the tiles along the tub. I then picked each one up and mudded it, then flipped it back down on the cement board.
We didn’t have to do any prepping of the original subfloor for this project because Michael had already been hard at work ripping out the original floor and then laying DenShield tile backer board as the base for our tile. We also had the benefit of working in a small space with all of the large furniture, and even the toilet, removed. We could lay out the tile and really see what it would look like before we started.
We knew that the back wall would be mostly hidden by our vanity and toilet, so we decided to start the tile from the tub’s edge. As it worked out, this layout didn’t require too many tiles to be cut, so we just laid out all of the full tile pieces using 1/8 inch spacers and then marked and cut the remaining few tiles using our tile saw.

I continued to lay out all of the tiles that I didn’t need to cut, using 1/8 inch spacers.

Almost done laying out all of the tile.
Laying the Tile with Mortar
Once all of the tile was laid out, I used a quarter-inch square notched trowel to apply mortar to the back of each of the tiles. I started in the corner farthest from the door. I would pick up a tile, butter the back, and then carefully lay it down in the same place. With such a small space to tile, it went incredibly quickly. Once done, I waited two full days before I walked on the tile, though I probably could have gotten away with waiting only one day.
For some reason I was sold on the idea of using the darkest grout available for this tile but Michael talked me down off of that ledge. I was going to buy Raven but instead we got Charcoal Gray. I am so glad we did. The Charcoal Gray was very dark going on, as you can see in the pictures below, but it lightened up over time. The grout looked great being applied and I was still in love with it even after it got a bit lighter.

I really wanted to go with the Raven grout color but Michael talked me into Charcoal Gray, which ended up looking great. (Color chart via TEC by H.B. Fuller)
Applying the Charcoal Gray Grout
To apply the grout, I started out with a rubber grout float, some large tiling sponges, some rags, a bucket of my grout, and a bucket of water. I used the corner of my float to scoop out the grout and then spread it into the crevices between the tiles. I used the wet sponges to wipe off the excess from the tops of the tile. I also used the rags to wipe up some of the moisture that can be left from the sponges. You’ll need to change out your bucket water quite frequently as you go through this process so that you don’t leave a haze on the tile from the dirty water.
It was so exciting to see the tile with the grout. It just made the patterns come alive! I made sure to press the grout into all of the spaces and to thoroughly clean the tiles before I finished. I waited for another couple days before walking on the tile again, though I did stand in the doorway a few hundred times and just stare at the final product.

The beautiful tile after applying the charcoal gray grout. I love it!

The grout went on very dark but it did lighten up eventually as it dried. I liked both the dark and lighter looks.

One more close-up look at the beautiful tile with the grout.

Here you can see the tile after the grout had dried and lightened up quite a bit.
This project has gotten us one step closer to a finished, and functional bathroom. Our next step is the subway tile tub surround and chair rail, which you can see a sneak peek of below. We should have a more detailed post coming on that soon and then we’ll hopefully have the final bathroom reveal not long after. For such a small space, it has really been a massive project (especially when you think of where we started), but it feels great to see it all coming together.

Once we finished the floor tile, we started tiling the tub surround and walls with subway tile.
UPDATE: Check out our progress on the bathroom in subway tile installation and finalizing our fixture and furnishing choices.
-
 How to Create a Removable Wall Mural Using Vinyl Birch Tree Decals
When I was originally planning my baby boy’s nursery, I wanted to include
How to Create a Removable Wall Mural Using Vinyl Birch Tree Decals
When I was originally planning my baby boy’s nursery, I wanted to include -
 Five Rules for Painting your Fridge
. . . and Yes, You Can Paint a Refrigerator!
Five Rules for Painting your Fridge
. . . and Yes, You Can Paint a Refrigerator!